
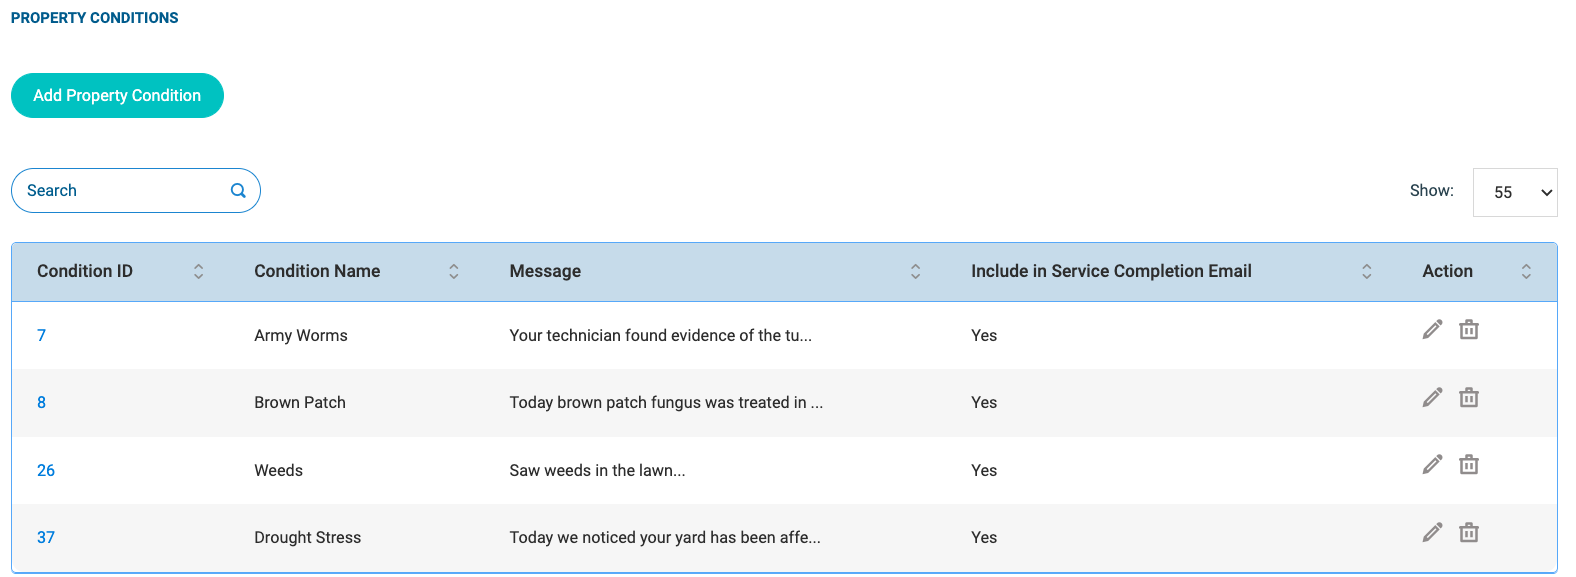
Property Conditions are standardized labels used to track recurring issues, turf diseases, weeds, or specific physical traits at the properties you service (for example: Armyworms, Brown Patch, Crabgrass, etc).
Creating a master list of Property Conditions in your Global Settings saves time for both office staff and technicians, ensuring consistent record-keeping and detailed service histories across all customer profiles.
Why Set Up Global Property Conditions?
- Standardized Reporting: Ensures technicians use consistent terminology when documenting property issues in the field.
- Faster Field Entry: Allows technicians to quickly select pre-configured conditions from a dropdown menu rather than typing manual notes for common issues.
- Better Customer Communication: Helps track ongoing lawn health trends over time and provides clear, detailed context on service completion reports.
Access & Configuration
To manage your master list of Property Conditions:
- Navigate to the Settings page.
- Go to the Property Conditions section.
- Click Add New (or click the edit icon next to an existing condition).
Fields to Complete in the "Add Property Conditions" Modal:
- Property Condition Name: Enter a clear label for the condition (e.g., Armyworms, Brown Patch, Crabgrass).
- Message: Provide detailed explanatory text or instructions regarding the condition (e.g., recommended treatment steps, precautions, or notes for the customer). This field has a limit of 1500 characters.
- Include Message in Service Completion Email? (Toggle Switch):
• Enabled (ON): Automatically includes the custom text entered in the Message box on the email notification sent to the customer upon service completion.
• Disabled (OFF): If turned off, the custom text entered in the Message box on the email notification will not be sent to the customer.
- Click Save to add the condition to your global settings.
For more information, see: Create Condition Codes in Company Settings & Add Condition Codes to a Property
Temporary Property Conditions
Use a temporary condition for something your technicians should report each time they see it, but that shouldn't stay on the property afterward.
To make a condition temporary, check Temporary when you add or edit it in the Property Conditions section of your settings. The box is unchecked by default, and your existing conditions are not changed. The conditions table has a Temporary column showing Yes or No.
How a temporary condition works:
- It is offered only on the technician's service completion screen, where it is listed with (Temporary) after its name. It is not offered on the office Add Property or Edit Property screens.
- When the technician completes the service, it does everything a regular condition does: it adds the property note, emails your admin users, fires the Zapier trigger, and adds its message to the Service Completion email (when Include Message in Service Completion Email? is on and the email template contains {PROPERTY_CONDITIONS}).
- It is then removed from the property straight away, so it doesn't appear under Active Conditions and can be added again on the next visit without anyone having to remove it.
Note: You can't make a condition temporary while any property still has it. Remove it from those properties first, or you will see: "Property Condition not updated. Remove it from every property before making it temporary." You can also simply delete the Property Condition which will remove it from all properties, and then add it again this time marking it as temporary.